CSS Selectors 101: Targeting Elements with Precision
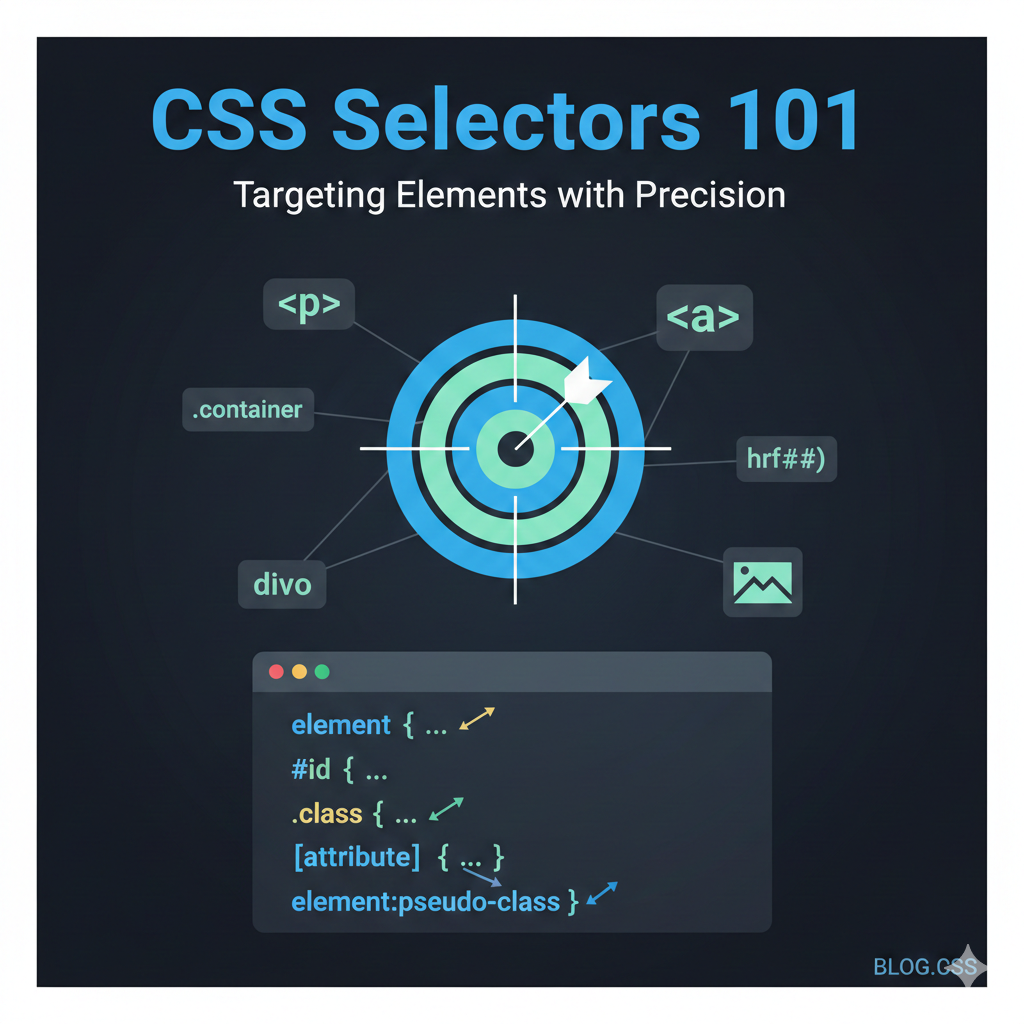
In this article we will look at the following topics in context of CSS selectors:
Why CSS selectors are needed
Element selector
Class selector
ID selector
Group selectors
Descendant selectors
Basic selector priority
Before jumping straight into the CSS selectors, lets dive-deep into What is CSS and Why do we need it?
CSS stands for Cascading Style Sheets. Let’s break it down further word-by-word, Cascade means changing something that already exists and Style Sheet simply means styling. Hence CSS means changing the style. The style can be anything like colour, size, font, background etc.
When we write HTML, we see that there is default style applied to the text, this default style is known as the User-agent Style of the browser. This default style can be changed/ overwritten by using CSS. Hence CSS gives user the freedom to choose their own style.
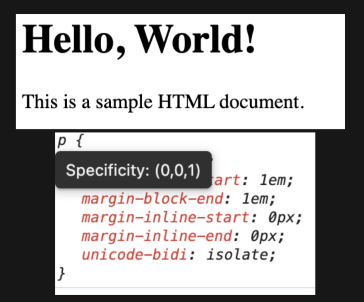
The above image shows HTML output and the default user-agent style applied to it.
What are CSS selectors
CSS selectors are used to select one or more elements at the same time to apply the desired style to that particular element. A selector is generally the tag’s name itself like p, h1, button etc.
Think of it like, a teacher asking all the students to stand up, similarly selector is the teacher that asks all the paragraph tags to apply a particular style to them. Ultimately, the main aim of selector is to select the desired html elements.
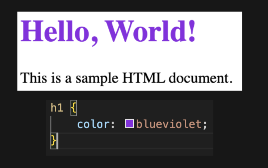
Types of CSS selectors :
Universal selector
Element (Type) selector
Class selector
ID selector
Group selector
Descendant selector
Child selector
Adjacent sibling selector
General sibling selector
Attribute selector
Pseudo-class selector
Pseudo-element selector
Why CSS selectors are needed
Imagine you are a teacher in a classroom and you say “Everyone, stand up!” .That works, but what if you want only Students wearing red shirts or the student with roll number 10 or all students sitting in the last bench. You need specific ways to point to people.
Similarly, a web page can have:
Hundreds of elements
Many buttons, headings, paragraphs, images
We need to specify which image or which heading we want to change, here comes the role of selectors, different types of selectors help us to select specific tags or elements. Without selectors, CSS wouldn’t know where to apply styles and everything would look the same (or nothing would work).
CSS selectors help us target elements precisely, just like giving clear instructions in real life.
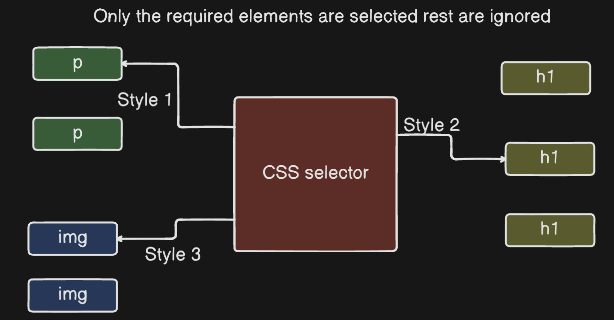
Types of CSS Selectors:
Element selector ->
The element selector selects HTML elements based on their tag name. It’s like saying, “All students, wear a blue uniform.” No filtering is there, everyone with that tag is affected.
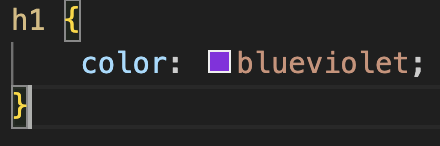
The above image means that the changes will get applied to all the h1 in the html document.
i.e all the h1 tags will have colour: blueviolet.
Use case :
Styling all headings
Setting default styles for paragraphs, lists, links
Class selector ->
The class selector selects elements with a specific class that is assigned to them. It is like saying “All the students of class 6th will have their test tomorrow”. Here all students of class 6th are inside a common entity. Similarly the changes applied to a particular class will be applicable to all those elements that have the same class.
It starts with a dot (.) symbol like .button , .heading etc.
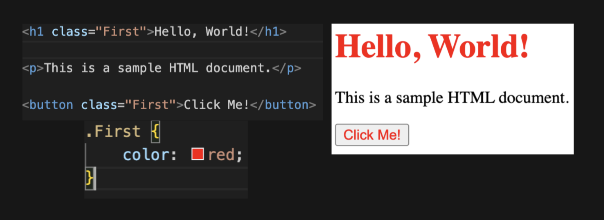
Here, the heading h1 and button had class “First”, hence both had their text colour changed to red.
ID selector ->
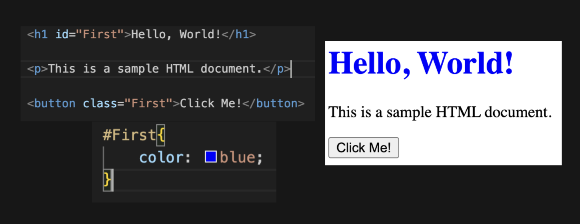
The ID selector selects one unique element.
Analogy : Its like calling someone by name, “Rahul, come here.” Only one person should have that name in that context. Important rule to select elements by ID is that the ID must be unique i.e only one element should have a given ID.
ID selector starts with # like #button, #card etc.
Use case :
Page headers
Unique sections
JavaScript hooks
Group Selectors ->
A group selector allows you to apply the same CSS styles to multiple selectors at once. Instead of writing separate rules for each element, you can combine them using a comma (,).
Syntax:
Example:
h1, h2, h3 {
  color: darkblue;
  font-family: Arial, sans-serif;
}
Explanation:
Here, the styles are applied to all headings h1, h2, and h3.
Instead of writing three separate rules, you save space and make your CSS cleaner.
Analogy:
Imagine labelling several boxes at once with the same sticker instead of labelling each individually.
Descendant Selectors ->
A descendant selector targets elements that are nested inside another element. It allows you to style elements based on their hierarchy in the HTML structure.
Example:
div p {
  color: green;
  font-size: 16px;
}
Explanation:
This selects all
<p>elements that are inside a<div>, no matter how deeply nested.A
<p>outside a<div>will not be affected.
Analogy:
Think of it like instructions for a family tree: “All grandchildren of this grandparent should wear green shirts.”
Basic selector priority (Specificity Algorithm) ->
When writing CSS for real-world projects, a common problem developers face is unexpected styling behavior, where an element does not appear the way they intended, even though the correct CSS seems to be written. This usually happens because multiple CSS rules target the same element at the same time, creating a conflict. For example, a paragraph might be styled by an element selector, a class selector, and an ID selector simultaneously. When this happens, the browser needs a clear rule to decide which style should win, otherwise the page would become unpredictable.
To solve this problem, CSS follows a well-defined system called selector priority, formally known as specificity. At a high level, CSS assigns different importance levels to different selectors. The priority order is simple:
ID selectors have the highest priority, followed by class selectors, and then element selectors.
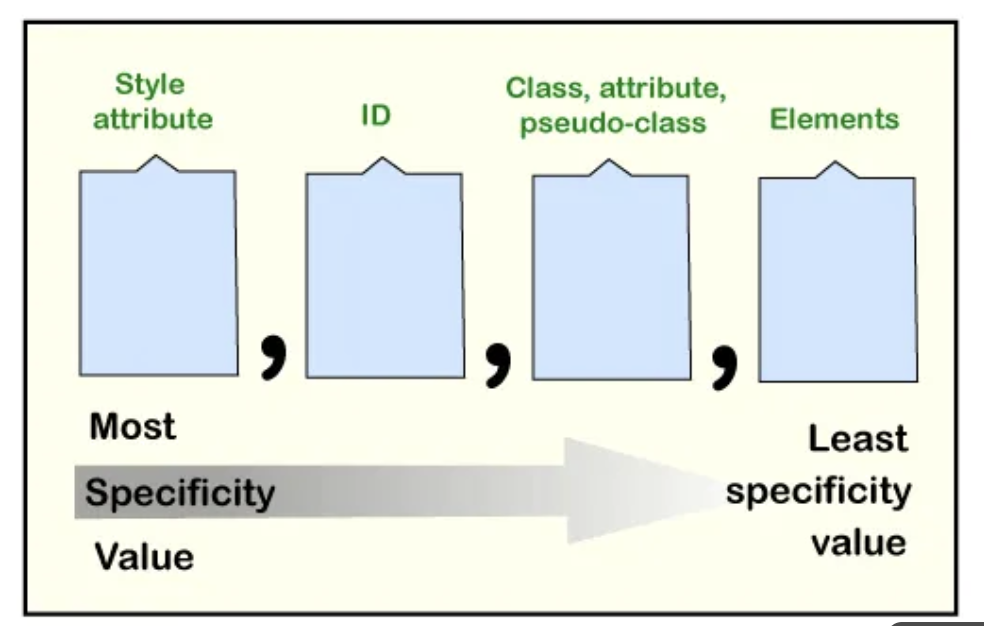
This system ensures that CSS remains predictable, scalable, and maintainable, even in large applications with thousands of styles. Understanding specificity helps developers avoid overusing IDs, reduce unnecessary overrides, and write cleaner CSS. In short, specificity exists to resolve conflicts logically, allowing the browser to consistently decide which styles should be applied when multiple rules compete for the same element.
Conclusion ->
In this article, we began by understanding what CSS is and why it is needed, especially to override the browser’s default user-agent styles and give developers full control over how a webpage looks and feels. From there, we explored what CSS selectors are and why they play such a critical role in targeting the right HTML elements among hundreds or even thousands on a page.
We discussed the most commonly used selectors—element, class, ID, group, and descendant selectors—and saw how each one serves a different purpose, from applying global styles to targeting highly specific elements. Through simple real-life analogies, it became clear that selectors act like clear instructions, helping CSS know exactly where and how to apply styles.
Finally, we touched on basic selector priority (specificity), which explains how CSS resolves conflicts when multiple rules apply to the same element. Understanding this priority system is essential for writing predictable, maintainable, and scalable CSS, especially in real-world projects.
In essence, mastering CSS selectors is not about memorizing syntax, but about learning how to target elements with precision and intention. Once you understand selectors and specificity, writing clean, efficient, and bug-free CSS becomes much easier—and your designs behave exactly the way you expect them to.